How to setup Auto Page Rank with A Google Cloud Service Accounts
Welcome to Auto Page Rank, let’s turbo charge your SEO ASAP but first you need to create a Google Cloud Service Account.
Creating a Google Cloud Service account is a straight forward process, follow the steps below to create a service account and to copy and paste it into Auto Page Rank so that it can be used to index your websites’ pages.
Thanks to Google’s Indexing API and Auto Page Rank it’s now possible for you to get your website to rank faster and higher in Google.
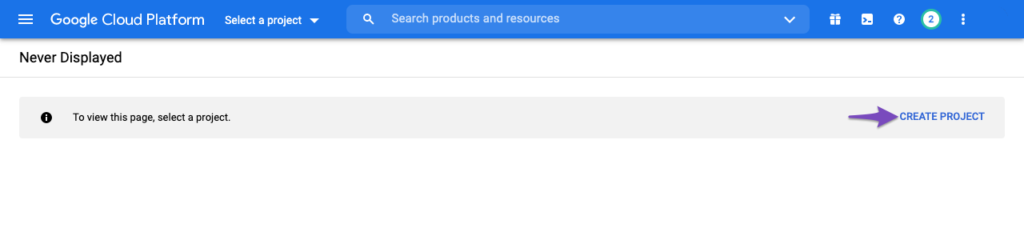
Click the CREATE PROJECT link on the right of the page
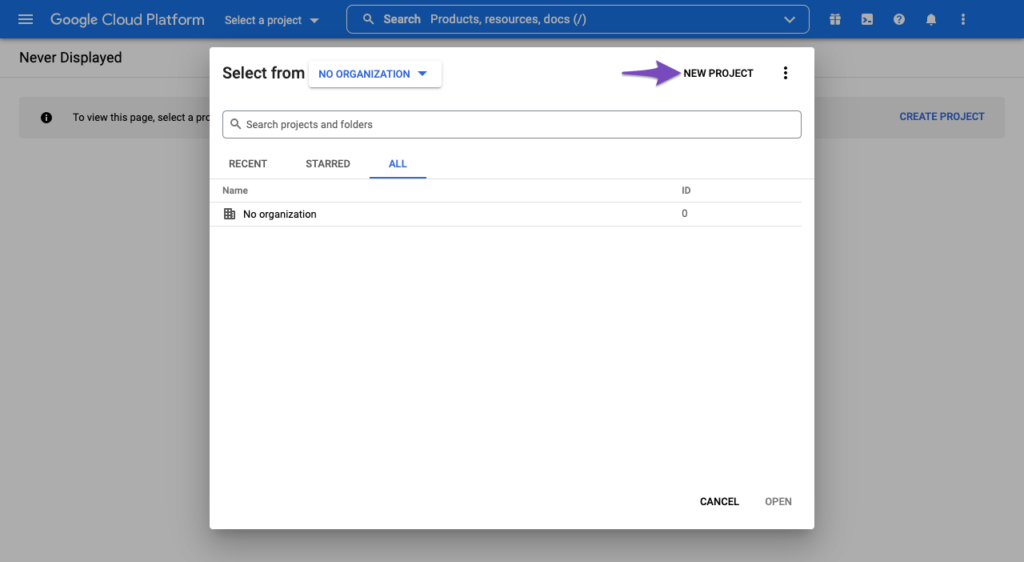
OR you can click the “Select a project” drop-down and choose New Project from the popup that appears on the screen.
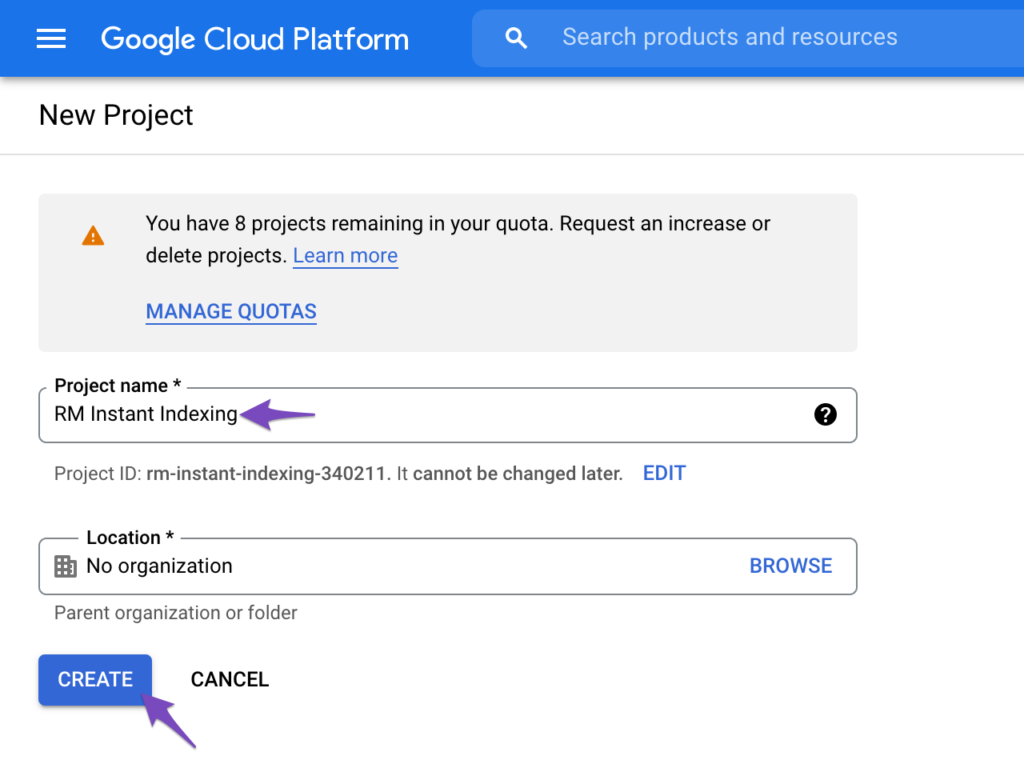
In the next screen, enter a project name that you can recognize later. And then click Create.
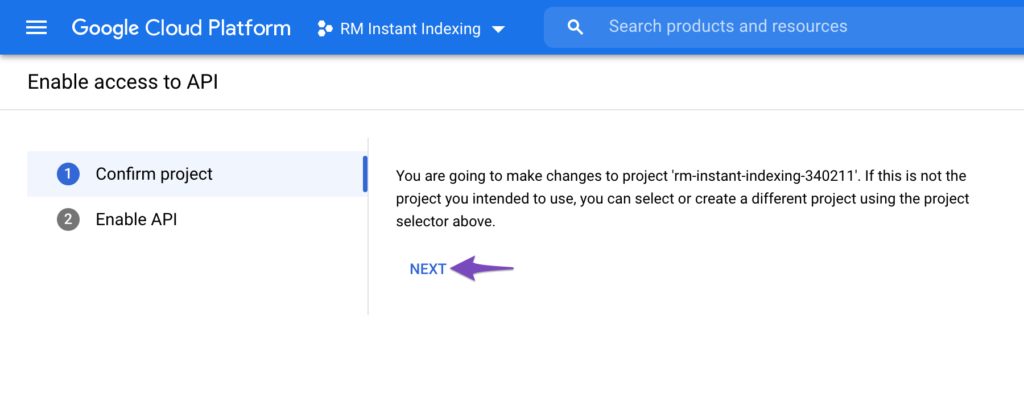
2. Enable Access to the Indexing API in your new project
Once you create the project, you need to give the project access the Google Indexing API. In the next step, you’ll see a screen as shown below. Confirm if the selected project is the one that just created, otherwise use the drop-down at the top to change the project. Once you’ve selected the project click Next.
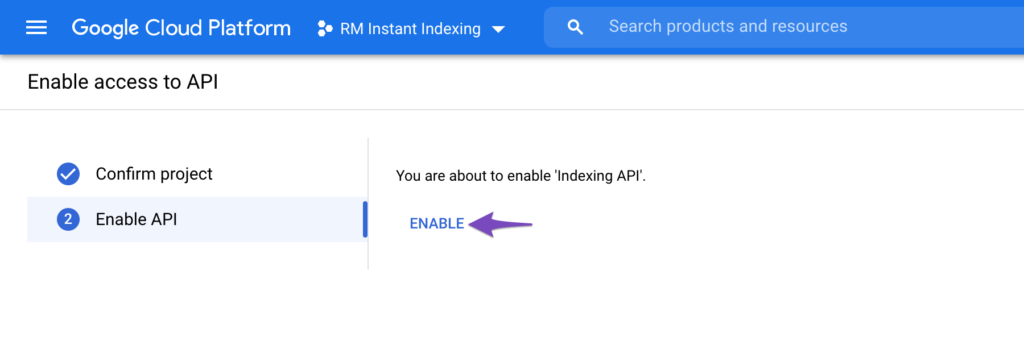
In the next step, click the Enable button to give the project to access the Google Indexing API.
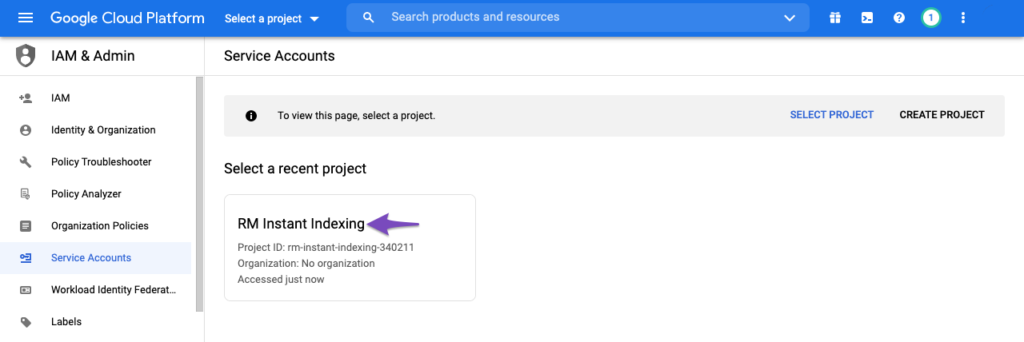
You will first be prompted to select the API project you wish to create this service account (the one created in the previous step).
3.2 Create Service Account
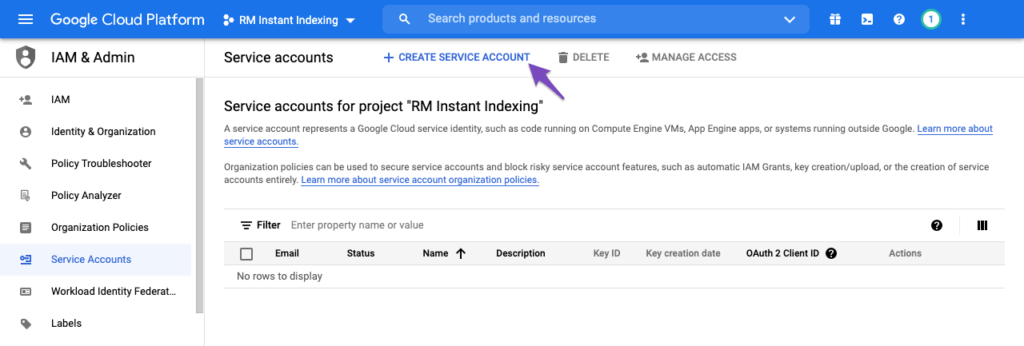
After selecting the project you wish to create a service account for, you’ll be taken to the following page, where you simply need to click the Create Service Account button highlighted below:
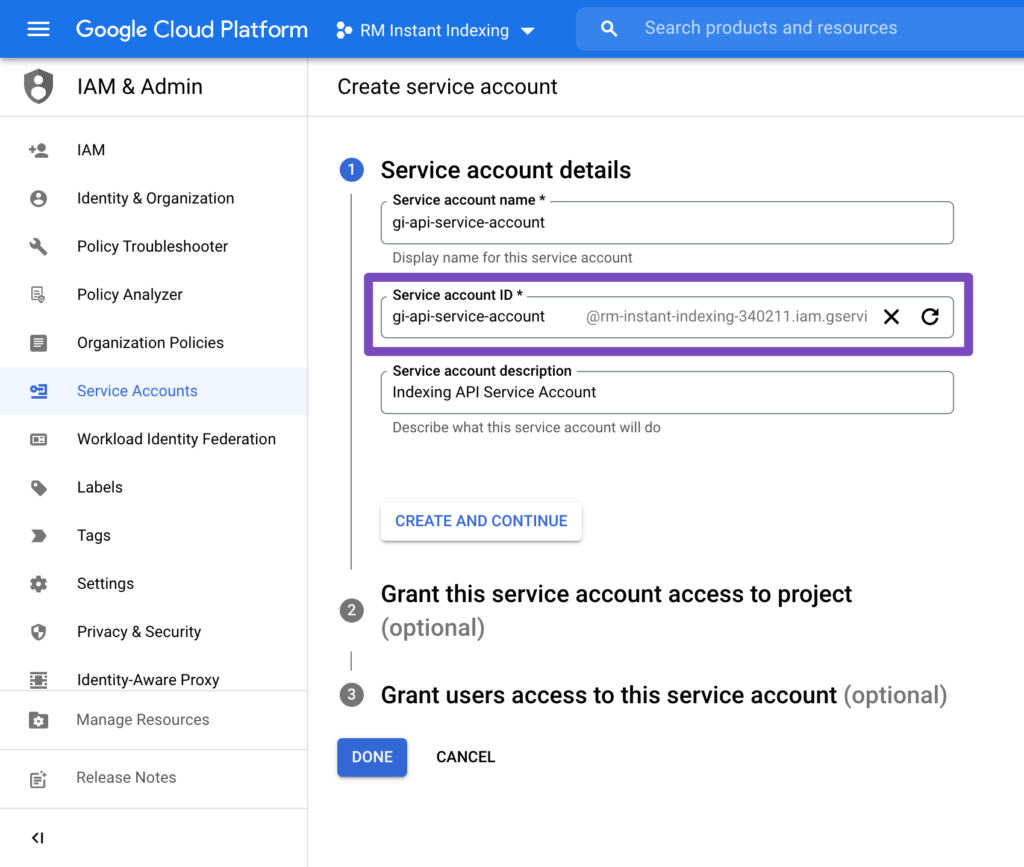
On the Create service account screen, enter a name and description for the newly created service account.
Select and copy the whole Service Account ID (the one that looks like an email address) and paste it into a text editor because you will need it later.
Then, click on the Done button at the bottom:
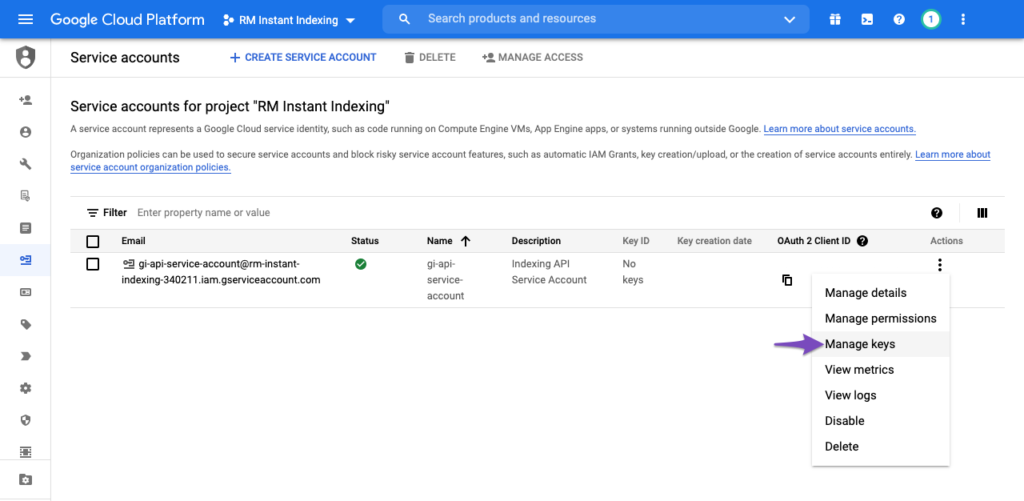
3.3 Manage Keys for Service Account
You will then be able to download the JSON file that contains your required Service Account Key for Auto Page Rank. To do so, simply click the three vertical dots in the Actions column and then select the Manage keyss as shown below:
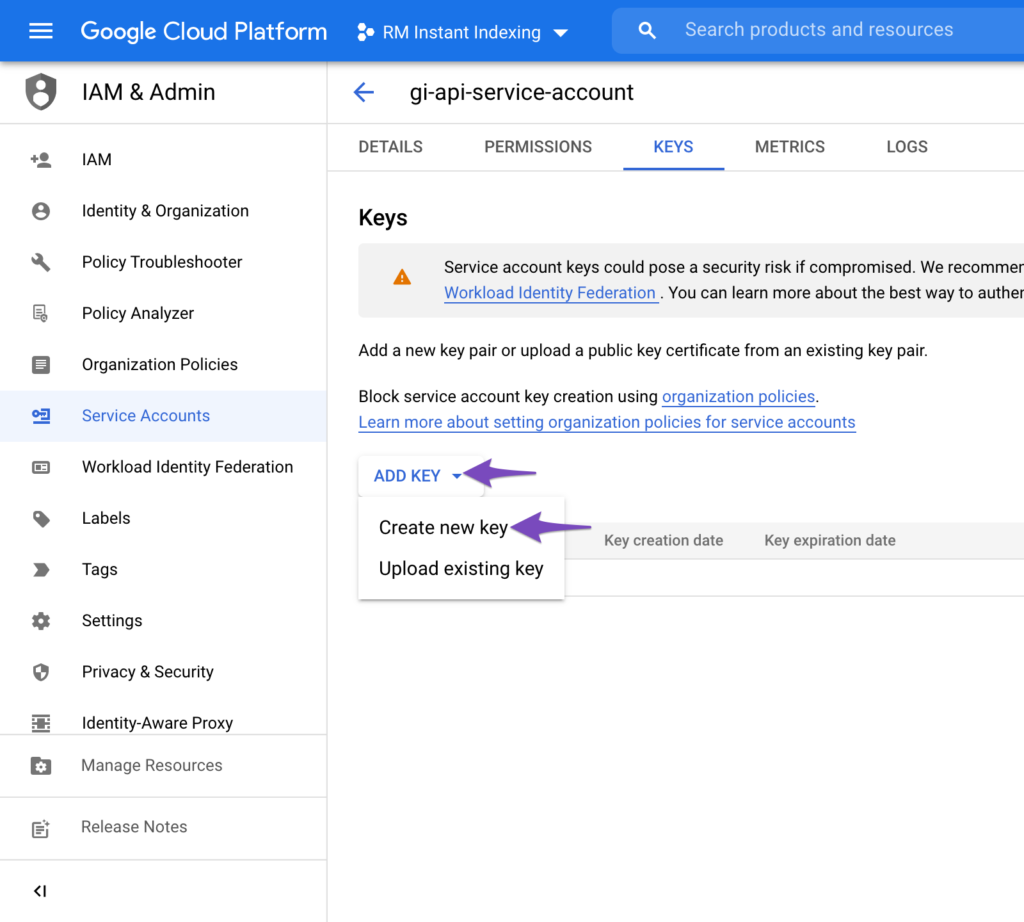
3.4 Create New JSON Key for Service Account
You will then be taken to the following page where you can click Add Key and then select the Create new key option, as shown below:
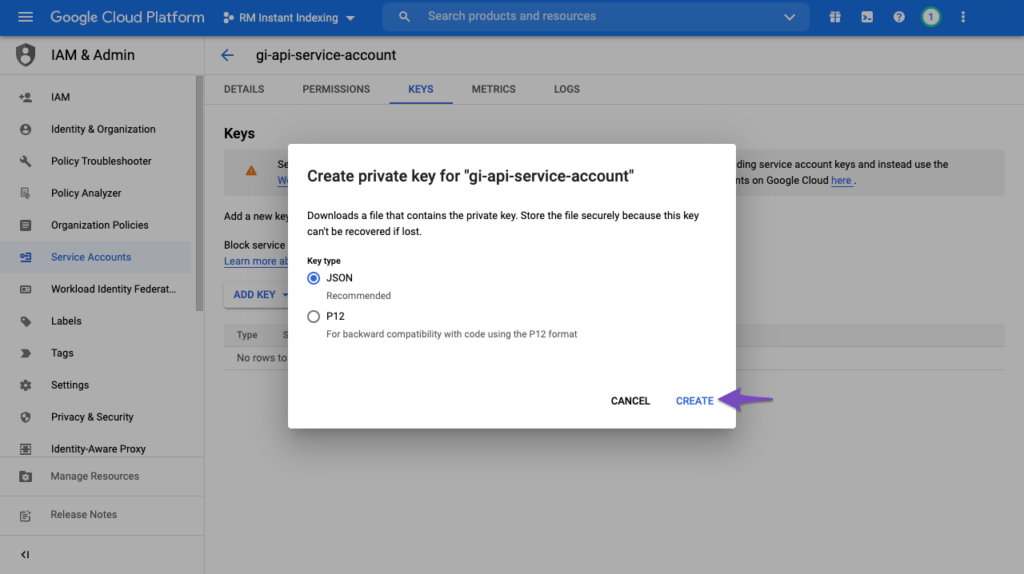
Choose the default JSON format when prompted in the overlay, and click Create:
Upon clicking Create, the .json file will be automatically downloaded in your browser, meaning you’ve successfully created the API key & can proceed to the next step!
The new file that you just downloaded will need to be copied and pasted into your account in Auto Page Rank.
4 Add the Service Account as an Owner of Your Google Search Console Property
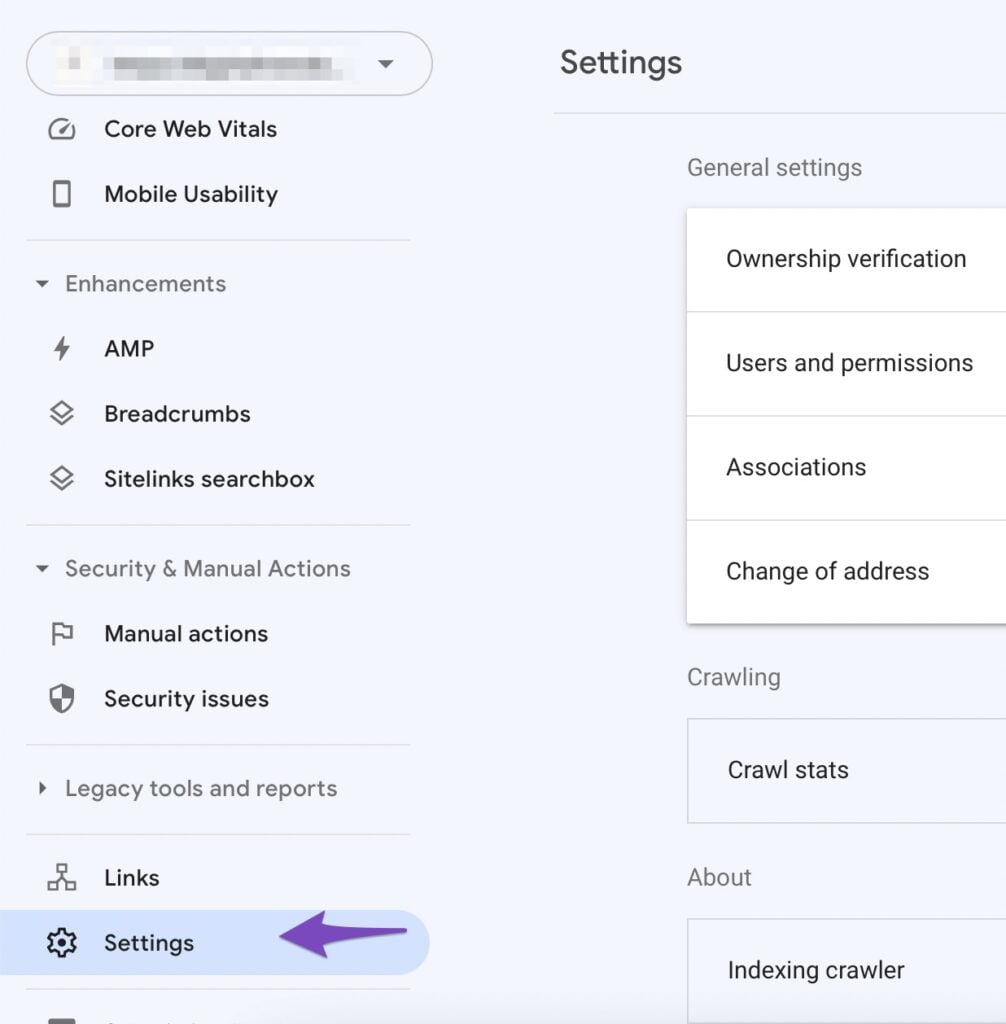
4.1 Navigate to Users and Permissions in Google Search Console Settings
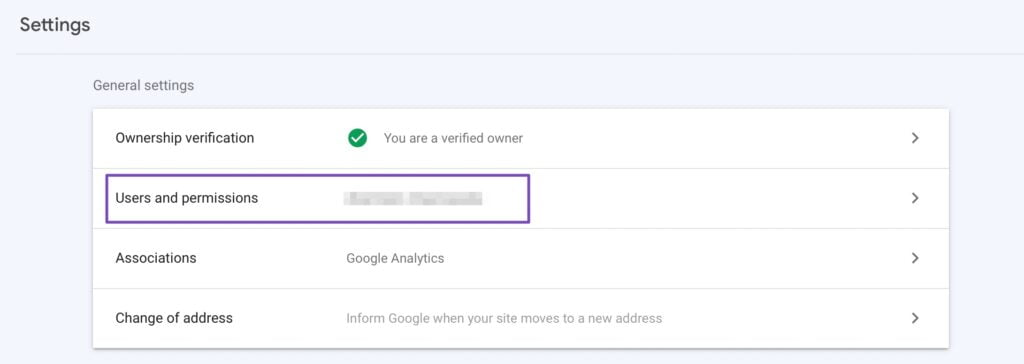
After verifying your property, open the Google Search Console, select your property on the left (if prompted), and then click on Settings near the bottom:
Click on Users and Permissions:
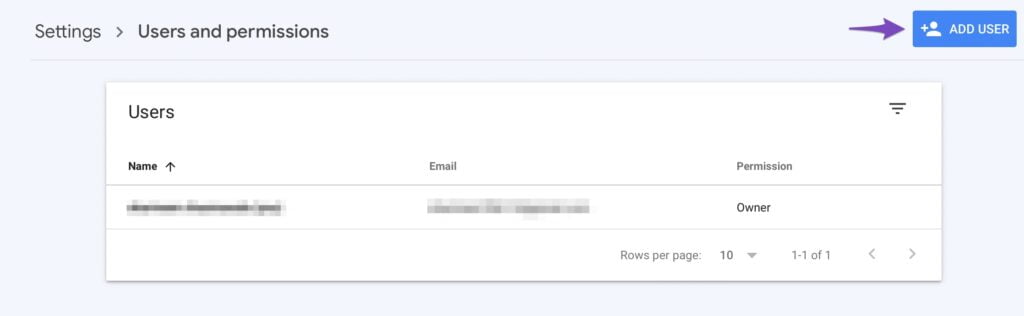
4.2 Add User to Your Search Console Property
Click on the three dots next to your account, and then click on Add User.
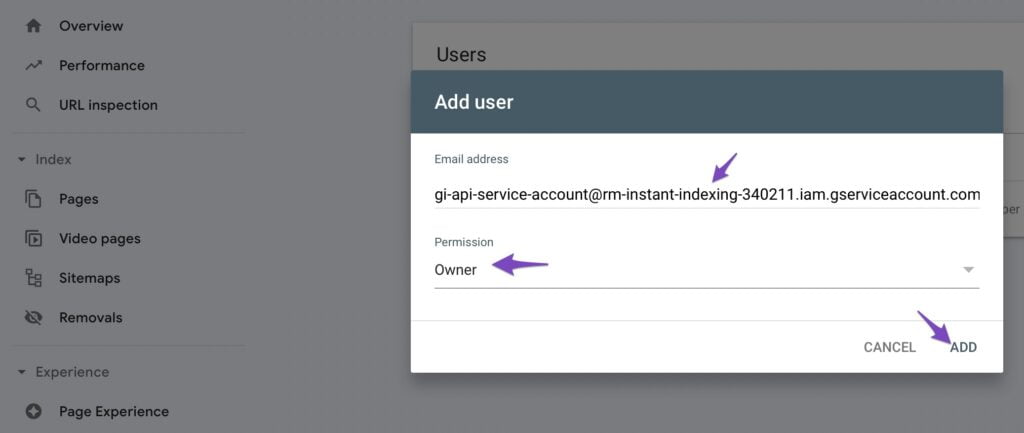
4.3 Delegate Service Account ID as Owner
A popup will now appear. Enter the Service account Email Address (the one you copied out earlier) in the Email address field. Ensure that you’ve provided Owner level Permission, and then click Add.
Now in a few moments, you should see the Service account listed as a new Owner.
We will use this Service Account and JSON API Key across all of your websites; just make sure that the Service Account is added as Owner for all the sites in the Search Console.
5 Configure Auto Page Rank
Login to Auto Page Rank via the Login button at the top right.
Once logged in navigate to the Profile -> Service Account page as shown below
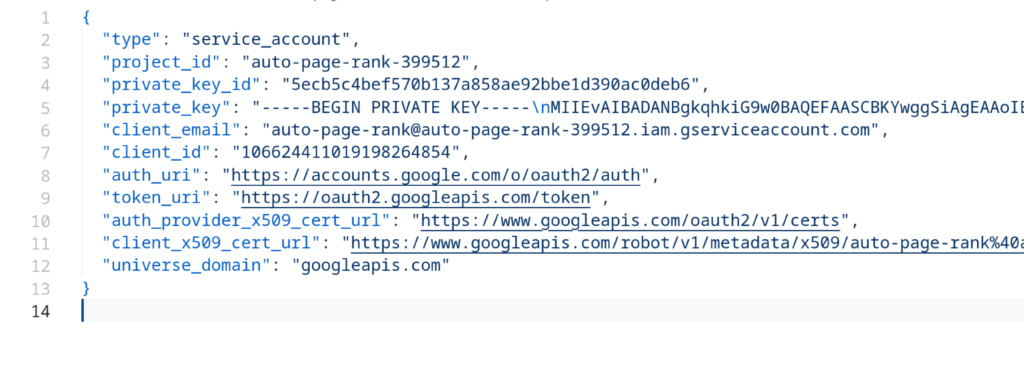
Copy and Paste The Entirety of the JSON file that you downloaded earlier. The file contains your service account information.
It should look like the picture below:
Now copy all of the contents of the JSON file and paste it into the Auto Page Rank Service Account text box:
After pasting your service account JSON contents into the text box click the save button in the bottom right corner
6. Navigate to the Websites page to begin indexing
Click the Website sidebar link on the left to being synchronizing all of your Google Search Console websites to Auto Page Rank.
Once on the page click the large purple “Synchronize” button at the top right. Only websites with valid Sitemaps will be loaded. If your website does not have a valid sitemap in Google Search Console then it will not be loaded into Auto Page Rank!
Look at the example below:
6.1 Set websites to Auto Synchronize or do it manually
Select the individual checkmarks next to each website that you want to auto index. Auto indexing occurs once per day until your quota of 200 pages is met.
You can also select each website individually to view which pages have been indexed and also to trigger a manual index of the respective website’s pages.
Example:
Congratulations! You have successfully setup Auto Page Rank with your new Google Service Account. If you are having any issues feel free to email me for help: